



Reading time: 25 minutes | Skill level: Intermediate to Advanced | Updated: August 2026
A top-end rebuild is the most cost-effective way to restore lost power, fix oil consumption, and extend the life of your marine engine without the expense of a full overhaul. This guide covers everything from diagnosis to final break-in — whether you are wrenching in your garage or deciding whether to trust a professional shop.
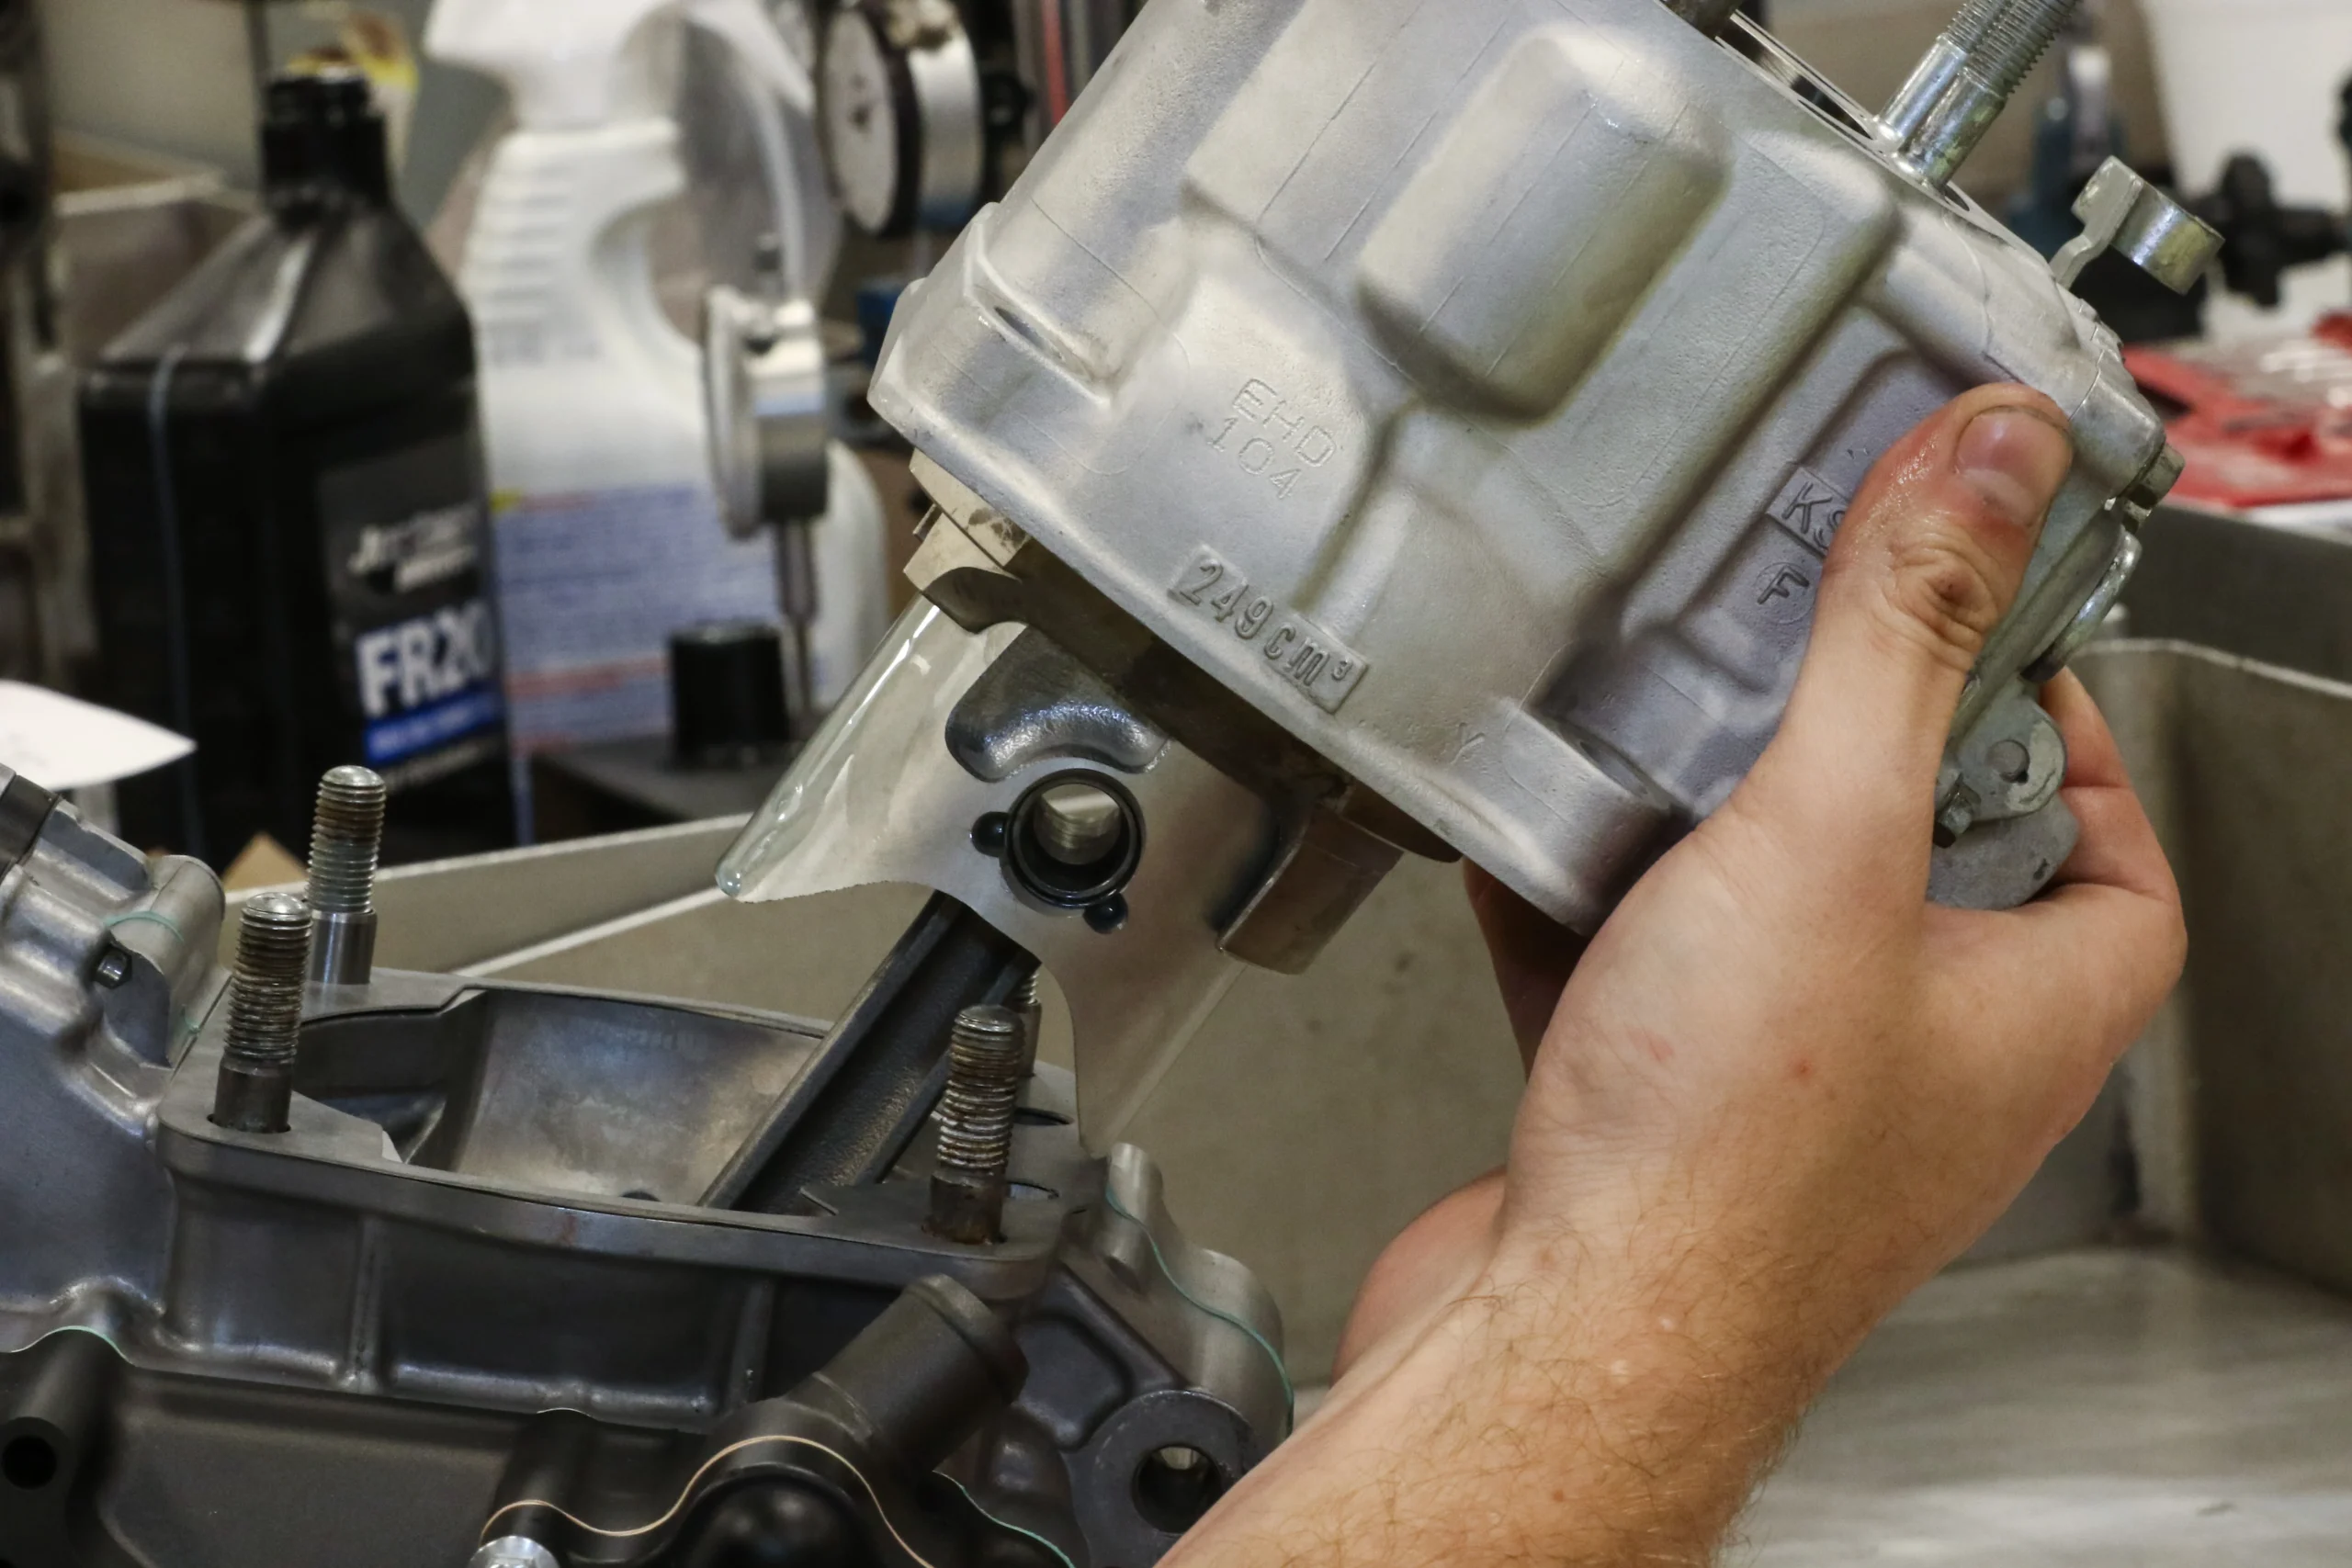
What is a “top end”? The top end of a marine engine includes the cylinder heads, valves, valve springs, retainers, guides, seals, pistons, piston rings, wrist pins, and cylinder walls. It is everything above the crankshaft. A top-end rebuild does not include the crankshaft, bearings, or bottom end — though you should inspect them while the engine is apart.
When Your Top End Needs Rebuilding
Not every smoky engine needs a rebuild. But if you notice two or more of these symptoms, it is time to open the engine:
Compression Loss A healthy marine gasoline engine shows 150–180 PSI per cylinder, with no more than 10% variance between the highest and lowest. Diesel engines typically show 350–450 PSI. A cylinder below 120 PSI (gas) or 300 PSI (diesel) indicates ring, valve, or head gasket failure.
Excessive Oil Consumption Burning more than 1 liter per 25 hours is abnormal. Blue smoke at startup (valve seals) or under load (rings) tells you exactly which component is failing.
Coolant in the Oil Milky oil or oil in the coolant means a blown head gasket or cracked head — both require immediate top-end attention.
Hard Starting / Misfires Low compression, leaking valves, or carbon-fouled chambers cause rough idle, hot-start problems, and power loss under load.
Overheating History An engine that has been severely overheated (above 220°F / 105°C) likely has warped heads, hardened valve seals, and weakened piston rings. Even if it “runs fine,” the damage is done.
Tools & Parts You Will Need
Essential Tools
-
Torque wrench (½” drive, 10–150 ft-lb range)
-
Inch-pound torque wrench (for head bolts and small fasteners)
-
Compression tester with marine adapters
-
Leak-down tester
-
Valve spring compressor (on-head type preferred for in-situ work)
-
Feeler gauges (0.001–0.030″)
-
Dial bore gauge or telescoping gauges + micrometer
-
Piston ring expander and compressor
-
Honing tool (ball hone or rigid hone)
-
Straightedge + feeler gauges (for head warpage check)
-
Clean, lint-free shop towels
Parts to Order
-
Head gasket set (always buy the full set, not just the gasket)
-
Valve stem seals (intake and exhaust — they are different)
-
Piston rings (standard or oversize — measure before ordering)
-
Pistons (only if damaged or if boring beyond max oversize)
-
Wrist pin bushings (if worn)
-
Head bolts / studs (many are torque-to-yield and cannot be reused)
-
Valve guide seals and retainers
-
Assembly lube (critical for first startup)
-
Engine oil and filter (for post-break-in change)
Pro Tip: Do NOT reuse torque-to-yield (TTY) head bolts. Modern marine engines (Mercury, Volvo Penta, Yanmar, Cummins) almost all use TTY bolts that stretch permanently during torquing. Reusing them risks head gasket failure at 2,000 RPM — which means doing the entire job again, plus a damaged block.
The 12-Step Top-End Rebuild Process
Step 1: Diagnose Before You Disassemble
Never assume. A leak-down test tells you exactly where compression is escaping:
-
Intake valve leak: Hissing from the throttle body / air intake
-
Exhaust valve leak: Hissing from the exhaust manifold
-
Ring leak: Hissing from the oil filler cap or dipstick tube
-
Head gasket leak: Bubbles in the radiator or coolant overflow
Record every cylinder. If only one cylinder is bad, you may get away with a “freshen” of just that bank. If three or more are weak, plan a full top-end job.
Pro Tip: Perform the leak-down test with the engine warm. Cold valves do not seal as well and can give false readings.
Step 2: Remove the Engine or Work In-Situ?
Marine engines are tighter than automotive engines. You have two options:
Option A: Remove the Engine Best for complete rebuilds. Gives you full access, lets you inspect the bottom end, and allows proper cleaning. Requires an engine hoist, alignment tools, and 6–10 hours additional labor.
Option B: In-Situ Top End Possible on many inboards with removable engine hatches. You can pull the heads and oil pan with the engine in the boat. Tight, but doable with patience and the right tools.
Pro Tip: If your engine has more than 1,500 hours or is 15+ years old, remove it. You will find bottom-end issues (bearing wear, oil pump wear, crank scoring) that should be addressed while you are already this deep.
Step 3: Disassembly & Organization
Label everything. Marine engines have unique configurations:
-
Photograph every hose, wire, and bracket before removal
-
Use zip-lock bags labeled with permanent marker
-
Keep pushrods, lifters, and rockers in order — they wear to their specific mating surfaces
-
Do not mix intake and exhaust valves — they are made of different materials
-
Tag each head “Port” and “Starboard” (they are often mirror images)
WARNING: Do not force frozen bolts. Marine engines live in a salt environment. Exhaust manifold bolts are especially prone to seizing. Apply penetrating oil (Kroil, PB Blaster) and let it work for 24 hours. A broken exhaust bolt in the head costs 3 hours to extract — or a new head.
Step 4: Inspect the Cylinder Heads
Send the heads to a machine shop unless you have experience. Here is what they should check:
Head Warpage Place a precision straightedge across the deck surface. Check with feeler gauges at 6 points. Warpage over 0.003″ (0.076mm) requires resurfacing. Over 0.006″ and the head may be too thin to save.
Valve Condition Look for:
-
Burnt edges (chocolate brown or white discoloration)
-
Bent stems (roll on glass — any wobble means bent)
-
Worn seats (pitting, cracking, or receding into the head)
-
Mushroomed tips (from excessive lash or worn adjusters)
Valve Guides Check stem-to-guide clearance with a dial indicator. Intake: 0.001–0.0025″. Exhaust: 0.0015–0.003″. Excessive clearance causes oil burning and poor sealing. Knurled or bronze-liner guides are standard repairs.
Cracks Magnaflux or pressure-test every head. Marine heads crack more often than automotive heads because of thermal shock (cold raw water hitting hot cast iron). Common crack locations: between valves, exhaust ports, and injector bores.
Pro Tip: If one head is cracked, assume the other is stressed. Pressure-test both. A “good” head with micro-cracks will fail within 200 hours.
Step 5: Cylinder Wall Inspection & Honing
The cylinder walls must be perfectly round and have the correct crosshatch pattern for ring seating.
Measurement Measure at top, middle, and bottom of each bore — both parallel and perpendicular to the crankshaft. Taper over 0.0015″ or out-of-round over 0.001″ means the cylinder must be bored.
Honing (If Within Spec) If the cylinder is round and within factory spec, use a ball hone or rigid hone to restore crosshatch:
-
120–240 grit for moly rings
-
280–400 grit for chrome rings
-
Crosshatch angle: 30–45 degrees
-
Use honing oil, not motor oil
-
Wash cylinders thoroughly with hot soapy water after honing — then wipe with white paper towel until it comes out clean. Any grit left destroys rings in 10 hours.
Boring (If Out of Spec) If the cylinder is tapered, out-of-round, or scored, it must be bored and honed to the next oversize. Standard oversizes: 0.010″, 0.020″, 0.030″, 0.040″. Never bore more than 0.060″ over on a cast-iron marine block — wall thickness becomes critical.
Pro Tip: After final honing, wash the block with hot soapy water and a brush. Then rinse with clean water, dry with compressed air, and immediately coat all machined surfaces with assembly lube or oil to prevent flash rusting.
Step 6: Piston & Ring Selection
Match your rings to your honing finish and application:
Ring Types
-
Cast iron moly-faced: Best for most marine rebuilds. Good wear resistance, quick seating.
-
Chrome-faced: Best for high-load, high-RPM performance engines. Harder, longer break-in.
-
Total Seal gapless: Maximum compression, but requires perfect cylinder prep. Not for first-time builders.
Ring End Gap Always check end gap before installation. Too tight and the ring butt-ends when hot, scuffing the cylinder. Too loose and you lose compression.
Typical marine end gaps (per inch of bore):
-
Top compression: 0.004″
-
Second compression: 0.005″
-
Oil control: 0.015″
Piston-to-Wall Clearance Measure piston skirt diameter 90 degrees from the pin bore, then subtract from cylinder bore measurement. Typical clearance: 0.0015–0.0025″ for cast pistons, 0.003–0.004″ for forged.
Pro Tip: File-fit your rings. Do NOT trust “pre-gapped” rings. Every cylinder is slightly different. Use a piston ring file and check every ring in its specific cylinder.
Step 7: Valve Job
A proper valve job is 50% of a top-end rebuild. Do not skip it.
Seat Refacing Cut the valve seat to the correct width:
-
Intake: 0.040–0.060″
-
Exhaust: 0.060–0.080″ (wider for heat dissipation)
Use a three-angle cut (30-45-60 degrees) for maximum flow and sealing.
Valve Lapping After cutting, lap each valve to its seat with fine compound until a consistent gray ring appears on both valve and seat. Clean thoroughly afterward — any compound residue destroys the engine.
Valve Stem Seals Always replace. Positive-type seals (Teflon) are best for modern engines. Umbrella seals are older technology and allow more oil past the guide.
Valve Spring Pressure Check installed height and pressure with a spring tester. Weak springs cause valve float at high RPM, which destroys pistons. Marine engines need stronger springs than automotive engines because of the sustained high-RPM operation.
Pro Tip: If you are upgrading to a performance camshaft, you MUST upgrade valve springs to match the cam’s lift and RPM range. A cam with 0.500″ lift needs springs rated for at least 0.550″ lift at the installed height.
Step 8: Head Gasket Installation
The head gasket is the most critical seal in the engine. A mistake here means coolant in the oil, compression loss, or a blown gasket at wide-open throttle.
Surface Prep Both the block deck and head surface must be perfectly clean:
-
No old gasket material (use a plastic scraper, NOT metal)
-
No oil or coolant residue
-
Smooth to the touch — no nicks or burrs
Gasket Selection
-
Composite: Older engines, forgiving of minor surface imperfections
-
MLS (Multi-Layer Steel): Modern engines, requires very smooth surfaces (Ra 50 or better), but handles higher combustion pressure
-
Copper: Racing applications, requires O-rings in the block
Torque Sequence Always torque in the manufacturer’s specified sequence — typically from the center outward in a spiral pattern. Marine head bolts are torqued in 3 stages:
-
30% of final torque
-
60% of final torque
-
100% of final torque
-
TTY bolts: additional angle torque (e.g., 90 degrees)
Pro Tip: Use ARP moly-based assembly lube under the bolt heads and washers. Oil gives inconsistent friction readings. Moly lube ensures accurate torque and even clamping force.
Step 9: Piston & Rod Installation
Work clean. Any dirt introduced now will circulate through the engine for its entire life.
Piston Ring Installation
-
Use a ring expander — never twist rings on by hand
-
Stagger ring gaps 120 degrees apart (top, second, oil rail)
-
Oil ring expander gap goes opposite the oil rail gaps
-
Coat rings and cylinder walls with clean 30W oil before installation
Piston Installation
-
Use a ring compressor that matches your bore size
-
Tap gently with the wooden handle of a hammer — do NOT force
-
Verify the piston is oriented correctly (arrow or notch toward front of engine)
-
Verify rod bearing orientation (tang locations)
Rod Bolt Torque
-
Use ARP rod bolts if upgrading — they are stronger and reusable
-
Torque to spec in 3 stages
-
Stretch-gauge TTY rod bolts to the specified length, not just torque
Pro Tip: Before installing pistons, dip each piston assembly in a bucket of clean 30W oil. This pre-lubes the rings, pin, and skirt. It takes 10 seconds and prevents dry-start scuffing.
Step 10: Valve Train Assembly
With the heads torqued down, install the valve train:
Pushrods & Lifters
-
If reusing hydraulic lifters, keep them in order — they pump up to their specific wear patterns
-
Soak new lifters in 30W oil for 24 hours before installation
-
Coat pushrod ends with assembly lube
Rocker Arms
-
Adjust valve lash to spec (typically 0.000″ for hydraulic, 0.018–0.022″ intake / 0.020–0.024″ exhaust for solid)
-
Rotate the engine through two full revolutions and recheck lash
-
Verify pushrods spin freely when the valve is closed (indicates proper geometry)
Pro Tip: On engines with adjustable rockers, set lash at TDC compression stroke for each cylinder. Do not try to set all 8/6/4 at once by just rotating the crank — you will be on the wrong stroke for half of them.
Step 11: Pre-Start Preparation
Before you turn the key:
Prime the Oil System
-
Remove the distributor or disable the ignition
-
Crank the engine with the starter for 15 seconds, rest 30 seconds, repeat 3 times
-
This fills the oil filter, galleries, and bearings before combustion pressure loads them
-
Verify oil pressure on the gauge (or mechanical gauge if no sender is installed)
Verify Timing
-
Set static timing to 8–12 degrees BTDC before starting
-
Marine engines often use different timing than their automotive counterparts due to load characteristics
Fuel System
-
Prime the fuel system (electric fuel pump or manual primer)
-
Check for leaks at all fittings before starting
Cooling System
-
Fill with the correct coolant (50/50 mix for closed cooling, or verify raw water flow)
-
On first start, run with a water supply connected (flush muffs or hose adapter)
Step 12: Break-In Procedure
A fresh top end requires a specific break-in to seat the rings and mate the valves:
First 30 Minutes (Critical)
-
Start the engine and immediately bring to 2,000–2,500 RPM
-
Vary RPM every 30 seconds — do NOT hold steady RPM
-
Run for 20–30 minutes with varying load
-
Monitor oil pressure, coolant temp, and exhaust smoke
-
Shut down and check for leaks
First 2 Hours
-
Run at varying RPMs between 1,500 and 3,500
-
No full-throttle acceleration yet
-
No extended idling (below 1,200 RPM) — oil splash may not reach the top end properly
First 10 Hours
-
Gradually increase to 75% throttle
-
Continue varying RPM — steady cruising is bad for ring seating
-
Change oil and filter at 1 hour, 5 hours, and 10 hours
-
Check valve lash after 5 hours (solid lifter engines only)
After 10 Hours
-
Normal operation
-
Change to synthetic oil if desired (we recommend conventional for the first 25 hours)
-
Compression test at 25 hours to verify ring seal
Pro Tip: Use a break-in oil (high ZDDP content) for the first 10 hours. Modern API SN/SP oils have reduced zinc/phosphorus to protect catalytic converters — but marine engines do not have cats. The extra ZDDP protects cam lobes and flat-tappet lifters during break-in.
Common Top-End Rebuild Mistakes
1. Reusing Torque-to-Yield Head Bolts TTY bolts stretch permanently during torquing. Reusing them risks clamping force loss and head gasket failure. Always buy new head bolts or upgrade to ARP studs.
2. Skipping the Hone New rings on glazed cylinders will never seat. The crosshatch pattern is what allows rings to wear into the wall and form a seal. A glazed bore = oil burning forever.
3. Wrong Ring End Gap Too tight and the ring butts when hot, scuffing the cylinder and losing compression. Too loose and blow-by pressurizes the crankcase. Always file-fit to spec.
4. Dirty Assembly One grain of sand in a cylinder destroys a piston in 5 hours. Wash the block after honing. Wash the heads after lapping. Work on clean towels. Cover the engine when not working on it.
5. Rushing Break-In Rings seat in the first 20 minutes. If you idle the engine or hold steady RPM during this window, the rings glaze and never seal. Vary RPM aggressively during break-in.
Cost Breakdown: DIY vs. Professional
Table
| Item | DIY Cost | Professional Cost |
|---|---|---|
| Machine shop (heads, bore, hone) | €400–€800 | Included |
| Gasket set | €150–€350 | Included |
| Pistons & rings | €300–€800 | Included |
| Valves, seals, springs | €200–€500 | Included |
| Tools (if buying) | €200–€500 | Not needed |
| Labor (your time) | 20–40 hours | Included |
| Total | €1,250–€2,950 | €2,500–€4,500 |
| Warranty | None | 24 months |
When DIY makes sense: You have tools, experience, and a clean workspace. You enjoy the process and accept the risk of a mistake.
When professional makes sense: The engine is high-value, you need a warranty, or you do not have 3–4 weekends to dedicate to the job. Our rebuilds include dyno testing, break-in, and a 24-month warranty.
Frequently Asked Questions
How do I know if I need a top-end rebuild or a full engine rebuild? A top-end rebuild fixes compression, oil burning, and head gasket issues. A full rebuild is needed when you have crankshaft bearing wear (low oil pressure at idle), rod knock, or cylinder damage below the piston ring travel area. Measure crankshaft endplay and rod bearing clearance before deciding. If the bottom end is healthy, a top-end job is sufficient.
Can I rebuild just one cylinder head? Technically yes, but we do not recommend it. Both heads experience the same heat cycles, hours, and fuel quality. If one head has cracked guides or burnt valves, the other is 80% likely to fail within the next 200 hours. Rebuild both heads simultaneously to avoid doing the job twice.
How long does a top-end rebuild last? A properly done top-end rebuild on a marine gasoline engine typically lasts 800–1,500 hours. Diesel top ends last 2,000–4,000 hours. Longevity depends on maintenance (oil changes, coolant condition), operating habits (avoiding overheating), and fuel quality.
Do I need to balance the rotating assembly after a top-end rebuild? If you are only replacing pistons and rings with identical-weight components, rebalancing is not strictly necessary. However, if you change piston weights (forged vs. cast), change the bob weight, or bore the cylinders significantly, the rotating assembly should be rebalanced. Unbalanced engines destroy bearings and cause vibration that cracks mounts and exhaust systems.
What is the difference between a “freshen” and a full top-end rebuild? A “freshen” typically means new rings, valve seals, and a head gasket — done in-situ without removing the engine. It costs less (€800–€1,500) but does not address valve wear, guide wear, or head warpage. A full top-end includes machine work, valve job, and proper measurement. A freshen is a gamble; a rebuild is an investment.
Can I reuse my old pistons? Only if they are undamaged and the cylinder is not bored. Inspect for:
-
Scuffing or scoring on the skirt
-
Cracks at the pin boss or ring lands
-
Excessive pin bore wear
-
Dish erosion from detonation
If the cylinder is bored, you need oversize pistons. If standard pistons are worn, replace them. Never install new rings on worn pistons — the ring lands will not support the rings properly.
Why does my rebuilt engine smoke for the first 50 hours? Light blue smoke during break-in is normal — it is assembly lube and excess oil burning off the cylinder walls. However, heavy smoke or smoke that persists beyond 25 hours indicates a problem: rings not seated, valve seals leaking, or incorrect piston-to-wall clearance. Compression test at 25 hours. If compression is low, the rings did not seat and the cylinders may need to be re-honed.
Should I upgrade to forged pistons during a rebuild? Forged pistons are stronger and handle detonation better than cast hypereutectic pistons — but they are also noisier (piston slap when cold) and require greater piston-to-wall clearance. For a stock recreational rebuild, cast pistons are fine. For supercharged, high-compression, or high-RPM builds, forged is mandatory.
Can I do a top-end rebuild with the engine still in the boat? Yes, on many inboard engines with good access. You can remove the heads, oil pan, and front cover without pulling the engine. However, you cannot properly inspect or hone the cylinders without at least removing the intake manifold and rotating the crank to bottom dead center for each cylinder. Outboard engines are easier — the powerhead separates from the midsection. Stern drives vary by model.
Ready to Restore Your Engine’s Power?
A top-end rebuild is the smartest investment you can make in a tired marine engine. Our workshop in Zaton, Poland handles everything from classic Crusader 5.7L rebuilds to high-performance Mercury Racing builds — all with dyno verification and a 24-month warranty.
